Testex Press-O-Film Replica Tape & Gage
Description


Press-O-Fil Roll Dial Thickness Gage (Inch & Metric)


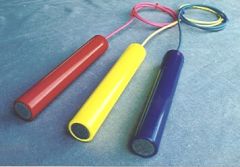
Training Surface Burnishing Tool
PRESS-O-FILM helps protect your investment in maintenance coatings
Before expensive protective coatings are applied, metal surfaces are usually cleaned by abrasive impact. Cleaned surfaces must meet agreed upon profiles for acceptable coating effectiveness and service life. But surface profiles for measurement by conventional techniques are frequently inaccessible or impossible to secure. Not for "Press-O-Film"!
Fast, Accurate Profiles with Press-O-Film
 A unique replica technique and a simple snap gage (see photo) make possible accurate, low-cost blast surface profile measurements. "Press-O-Film" makes surface replicas easy to obtain and produces average maximum peak to valley readings that assure optimum blasting effectiveness. Replicas can be stored for reference when needed.
The accuracy of "Press-O-Film" measurements is due to an innovative two-level film that can produce virtually exact replicas of abrasive blast surfaces. The film is available in thickness grades that cover the most common ranges of blast profiles used in industry:
COARSE Minus: (0.5 TO 1.0 MILS / 12 TO 25 MICRONS)
COARSE: (0.8 TO 2.5 MILS / 20 TO 64 MICRONS)
X-COARSE: (1.5 TO 4.5 MILS / 38 TO 115 MICRONS)
X-COARSE PLUS: (4.6 TO 5.8 MILS / 116 TO 147 MICRONS)
Complete Press-O-Film Kits contain one Testex Thickness Gauge, one Roll Coarse Film, one Roll XCoarse Film, one Burnishing Tool, and complete instructions for use.
Key Standards and Practices
- STANDARDS GOVERNING USE OF REPLICA TAPE TO MEASURE PROFILE
- ASTM - (American Society for Testing and Materials) D 4417. Standard Test Methods for Field Measurement of Surface Profile of Blast Cleaned Steel
- NACE - International (National Association of Corrosion Engineers) RP0287: Standard Recommended Practice: Field Measurement of Surface Profile of Abrasive Blast Cleaned Steel Surfaces Using a Replica Tape
- SSPC - the Society for Protective Coatings: SSPC-SP 5, SP 6, SP 10, SP11-87T
- ISO - International Organization for Standardization: Standard ISO8503-5 Preparation of steel substrates before application of paints and related products - Surface roughness characteristics of blast-cleaned steel substrates - Part 5: Replica tape method for the determination of the profile
In cases where standards compliance is required, the full original current standard should be consulted.
How Replica Tape Works

- Replica tape consists of a layer of compressible foam affixed to an incompressible polyester substrate.
- When pressed against a roughened (steel) surface, the foam collapses...
- Acquiring an impression of the surface.
- Placing the compressed tape between the anvils of a micrometric thickness gage, and subtracting the contribution of the incompressible substrate (50 micrometers or 0.002 inches), gives a measure of the surface profile.
Sources Of Error In Gage Profile Measurement
A human hair is about 2 mils (50 microns) thick and individual bacteria are 0.1 mil (2.5 microns) in size. Field profile measurements to accuracies in this range will be influenced by subtle effects.
The four major sources of error in determining the profile of a blasted surface using replica tape and a micrometer gage are:
1) Inherent variation in point-to-point profile over the surface being measured,
SSPC - The Society for Protective Coatings - is currently (2010) developing standardized guidance on number of measurements per unit area.
2) Presence of particles of dirt on either the replica tape or gage,
Reasonable care should be taken to keep the gage anvils free of dirt or grit. Questionable measurements should be double checked.
3) Gage accuracy,
Suitable micrometric thickness gages commonly cite an accuracy of ±0.2 mil (5 microns). In addition to gear errors of this magnitude, we have observed that they commonly read approximately 0.1 mil high at room temperature and 0.1 mil low at freezing. Only gages specifically designed for use with replica tape will have the correct accuracy, closing force, anvil/contact point dimensionsand parallelism specifications.
4) Rubbing technique,
| Accurate Replicas in Three Easy Steps |
|
| Step One: Prepare and Position the Tape | |
|
 |
| Step Two: Burnish the Film | |
|
 |
| Step Three: Measurement | |
|
 |
Other Uses for Press-O-Film CX
Superior blast surface profile measurements are only one of several effective uses for the Coarse and XCoarse grades of "Press-O-Film" by Testex, Inc. Check out these other cost-cutting ways "Press-O-Film" might help you speed production and improve product quality:
- Nodular and rough surfaces for fiber processing
- Rough machined surfaces (over 2.5 µm)
- Printing rolls (quality and wear life analysis)
- Papermaking machinery
Also Available from Testex
Press-O-Film for Micro-Surface Examination & Measurement
Testex, Inc. also produces a line of replication films for determining surface roughness in the 0.25 - 500 microinch AA range. These grades of "Press-O-Film" meet today's highly precise, difficult to achieve measurements for industrial quality control, receiving inspection and documented compliance with specified tolerances and standards.
"Press-O-Film" makes possible accurate measurements in locations not possible with conventional stylus devices, such as small ID surfaces, vertical and inverted surfaces, small lands, saddle points, etc.
If you need surface profile measurements - whether coarse or microfiine - you need "Press-O-Film" by Testex, Inc. For more information and pricing, please contact Corrosion Control Products Company.
Detailed Step-by-Step Instructions
DETAILED STEP-BY-STEP INSTRUCTIONS FOR USING PRESS-O-FILM WITH A "TESTEX DIAL THICKNESS MICROMETER GAGE":
Note: The graphic on each piece of tape will help you remember the new (Step 9) averaging procedure.
Step 1: Locate a representative site for measurement.
Step 2: Select an appropriate grade of Press-O-Film replica tape based on your target profile:
For 0.8 to 2.5 mils (20 to 64 um) => “Coarse” grade
For 1.5 to 4.5 mils (38 to 115 um) => “X-Coarse” grade
The primary range for measurement with replica tape is 0.8 to 4.5 mils (20 to 115 um).
Use of Coarse Minus grade (<0.8 mil or <20 um) or X-Coarse Plus grade tape (>4.5 mil or >115 um) should be restricted to checking measurements at the lower or upper ends of the primary range.
Step 3: Prepare the snap gage: clean anvils, adjust zero point to read minus 2.0 mils, the thickness of the incompressible substrate. On a conventional Testex thickness gage a setting of minus 2.0 mils is equivalent to a setting of (plus) 8.0 mils. (Pre-setting the gage in this way subtracts the thickness of the incompressible plastic substrate automatically from all readings.)
Step 4: Pull a single piece of adhesive-backed tape free of its release paper. The Press-O-Film replica material is the 0.4 inch (1.0 cm) square white plastic film at the center of the adhesive-backed paper. A “bulls eye” circle of paper should remain behind on the release paper (i.e., it is not used in the measurement.)
Step 5: Check film thickness with gage. Film may vary in thickness and maximum limits of profiles cannot exceed thickness of the film coating.
Step 6: Apply film to blasted surface. Press adhesive-backed paper to hold it firmly in place.
Step 7: Firmly compress replica film with the smoothest surface on the round-end rubbing tool provided, applying sufficient pressure to produce a replica with a uniform pebblegrain appearance. (In a pinch, the rounded edge of the tape dispenser is also an acceptable tool.) Use either a circular, or x-y rubbing motion. Fully compress all parts of the film but be careful not to slide the film with respect to the blasted surface by bumping edges of the circular paper cutout. In general, too much compression is safer than too little.
Step 8: Remove replica and place between anvils of micrometer gage, making sure replica is centered between anvils. Gage reading is a measure of average maximum peak-to-valley height of the blasted surface (when snap gage is adjusted as in step 3). If differing numerical values are obtained for the same site, the lowest value will tend to occur where the replica foam has been most completely compressed and therefore be the most reliable. Double check using a comparator.
Step 9: If a measurement with either Coarse or X-Coarse grade is in the 1.5 to 2.5 mil (38 to 64 μm) window (inclusive), take a 2nd reading with the OTHER grade. If both readings are in the 1.5 to 2.5 mil (38 to 64 μm) range, record the average as the observed profile.
Readings made with either grade that are outside this range - i.e., between 0.8 and 1.4 mils (20 to 37 μm) or between 2.6 and 4.5 mils (65 and 115 μm) - should be used as is, i.e. without averaging.Note: The graphic on each piece of tape will help you remember this new averaging procedure.
Note 1: Rolls of old formulation (non-HT) Press-O-Film can be safely used with these new instructions.
Note 2: If user circumstances warrant, the new (HT) tape can continue to be used with the old (non-averaging) instructions.
Note 3: “Average” = add the Coarse reading to the X-Coarse reading and divide by 2.
Note 4: Measurements made using the new POF-HT averaging procedure should be marked “HT”. If measurements are made without averaging, they should be marked “non-HT”.

Other Uses for Press-O-Film CX
Superior blast surface profile measurements are only one of several effective uses for the Coarse and XCoarse grades of "Press-O-Film" by Testex, Inc. Check out these other cost-cutting ways "Press-O-Film" might help you speed production and improve product quality:
- Nodular and rough surfaces for fiber processing
- Rough machined surfaces (over 2.5 µm)
- Printing rolls (quality and wear life analysis)
- Papermaking machinery
Also Available from Testex
Press-O-Film for Micro-Surface Examination & Measurement
Testex, Inc. also produces a line of replication films for determining surface roughness in the 0.25 - 500 microinch AA range. These grades of "Press-O-Film" meet today's highly precise, difficult to achieve measurements for industrial quality control, receiving inspection and documented compliance with specified tolerances and standards.
"Press-O-Film" makes possible accurate measurements in locations not possible with conventional stylus devices, such as small ID surfaces, vertical and inverted surfaces, small lands, saddle points, etc.
If you need surface profile measurements - whether coarse or microfiine - you need "Press-O-Film" by Testex, Inc. For more information and pricing, please contact Corrosion Control Products Company.


